Pasta ruvida
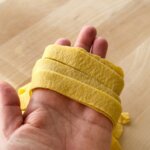
In Italian this translates to rough pasta, denoting the rough, textured finished achieved with this easy technique.
Ingredients
Instructions
Make the dough
- Follow my master dough recipe and rest the dough for 30 minutes.
Initial pass through the sheeter
- Cut the ball of dough into 4 equal parts. Work with one at a time and keep the rest covered with a bowl or wrapped in clingfilm. Use your hands or a rolling pin to flatten the piece of dough, then pass it through a pasta machine on the widest setting.
- Fold it in half, and pass it through again. Repeat this step several times until the dough has widened and is uniform in shape.
- Then progress from setting 0 to setting 1 – we don’t want to go any further at this point.
Partially dry the dough
- Take your thick sheet of dough and place it on a mesh drying rack or on a clean tea towel and allow it to partially dry – I do this for about 20-30 minutes in front of a small fan, flipping it over from time to time.
- We want to dry the dough enough that when you bend and stretch the sheet, you can see the surface breaking. If you dry it too much however, it will break in the machine.
Second pass through the sheeter
- Return to the pasta machine. This time increase the thickness dial to setting 5 or 6.
- Use a rolling pin to lightly flatten the sheet to help it pass through the machine – you’re going from one of the widest settings to a much thinner one, and the dough can get caught and snap if you don’t do this.
- Run the dough through setting 6 once or twice if you like – you’ll immediately see that the surface texture has broken and left a wonderfully textured finish.
Final cut/shaping
- With your sheeted dough you can now use it as you wish! Personally I love making pappardelle or tagliatelle with pasta ruvida.
Notes
Bear in mind that this dough is drier and more brittle, so while it can be used for stuffed pasta, it is a bit more fickle.
