A step-by-step guide to making pasta ruvida
If you’re looking to level up your pasta-making game, this step-by-step guide to making pasta ruvida is for you. Pasta ruvida is an easy technique that creates an unbeatable surface texture on your pasta sheets – perfect for pappardelle, tagliatelle, lasagne or even stuffed pasta. Below you’ll find my complete guide to making this highly coveted textured pasta.

In all my years of pasta making, this is the one technique that always felt so elusive. As someone who is self-taught, a lot of what I’ve learnt over the years is through deep research, a lot of practice and trial and error.
And while I know it’s impossible to know absolutely everything about pasta (kind of why I love it so much – there’s so much to learn!), I was honestly a little surprised that I didn’t know this technique.
I’d often see videos of chefs and other pasta makers rolling this incredible looking textured egg pasta, where the surface would have cracks similar to the stripes on a tiger. But the full step-by-step was never shown, and I had no idea how exactly they were doing it. It kind of drove me mad to be honest.
It took me a while to even identify the name for this kind of pasta, but once I finally came across the term – pasta ruvida – I was well on my way to mastering it myself. And seeing as I’m never one to gatekeep, I wanted to put together this step-by-step guide so you can too.
What is pasta ruvida?
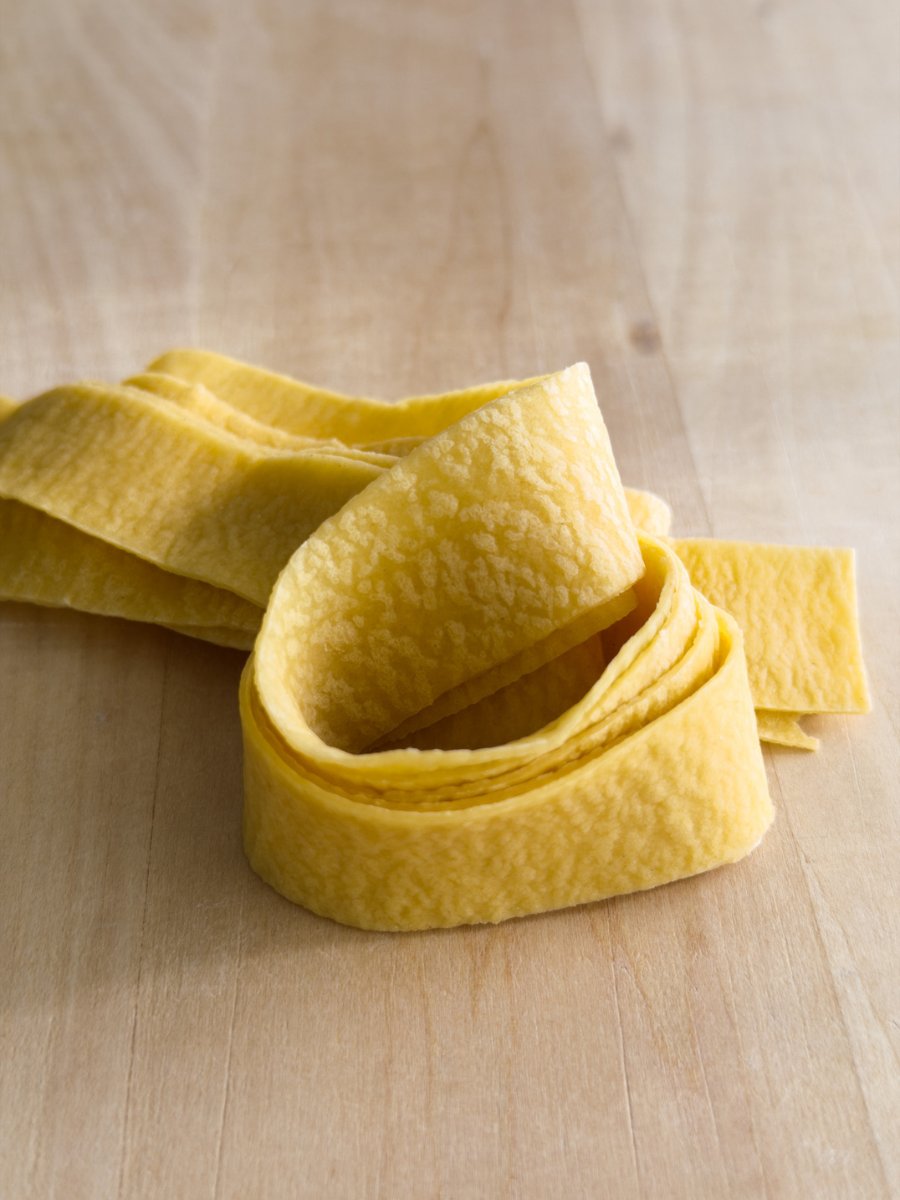
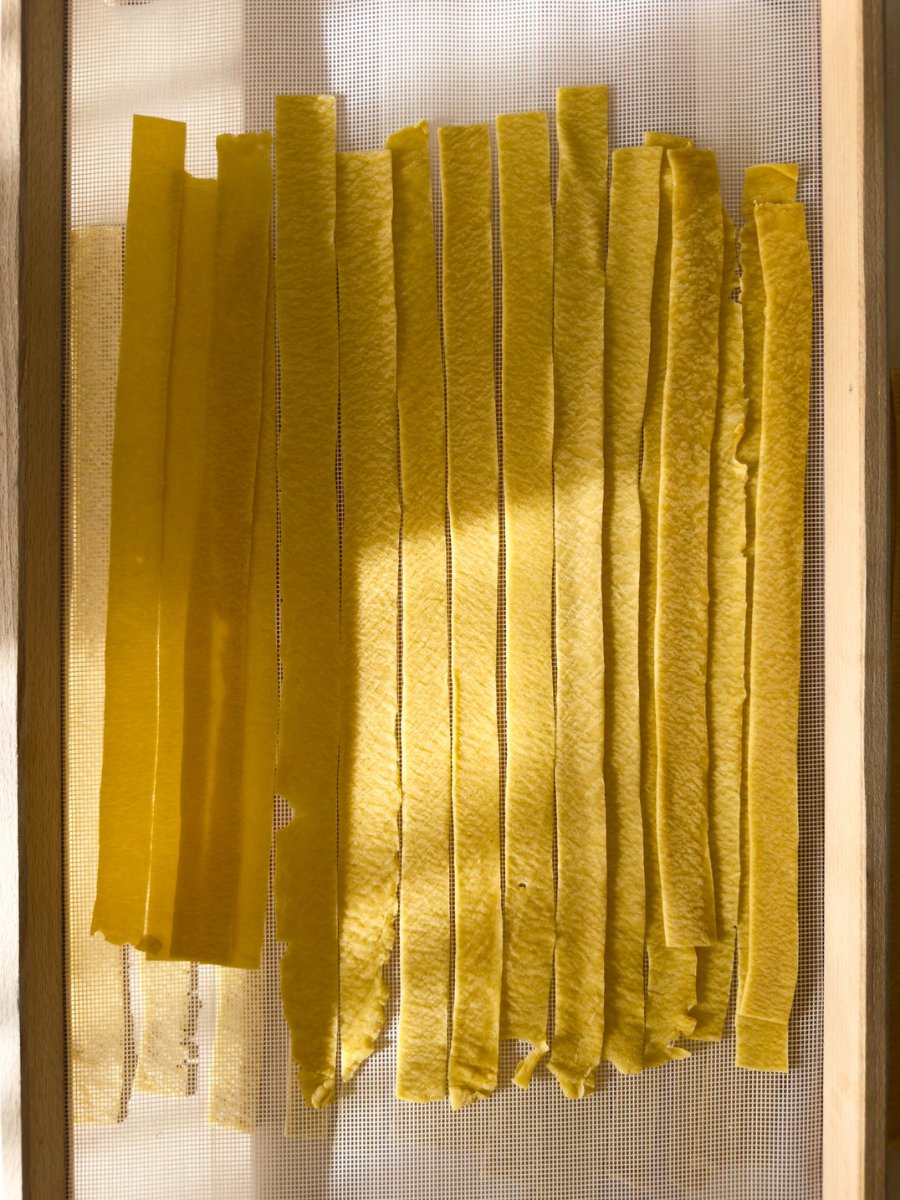
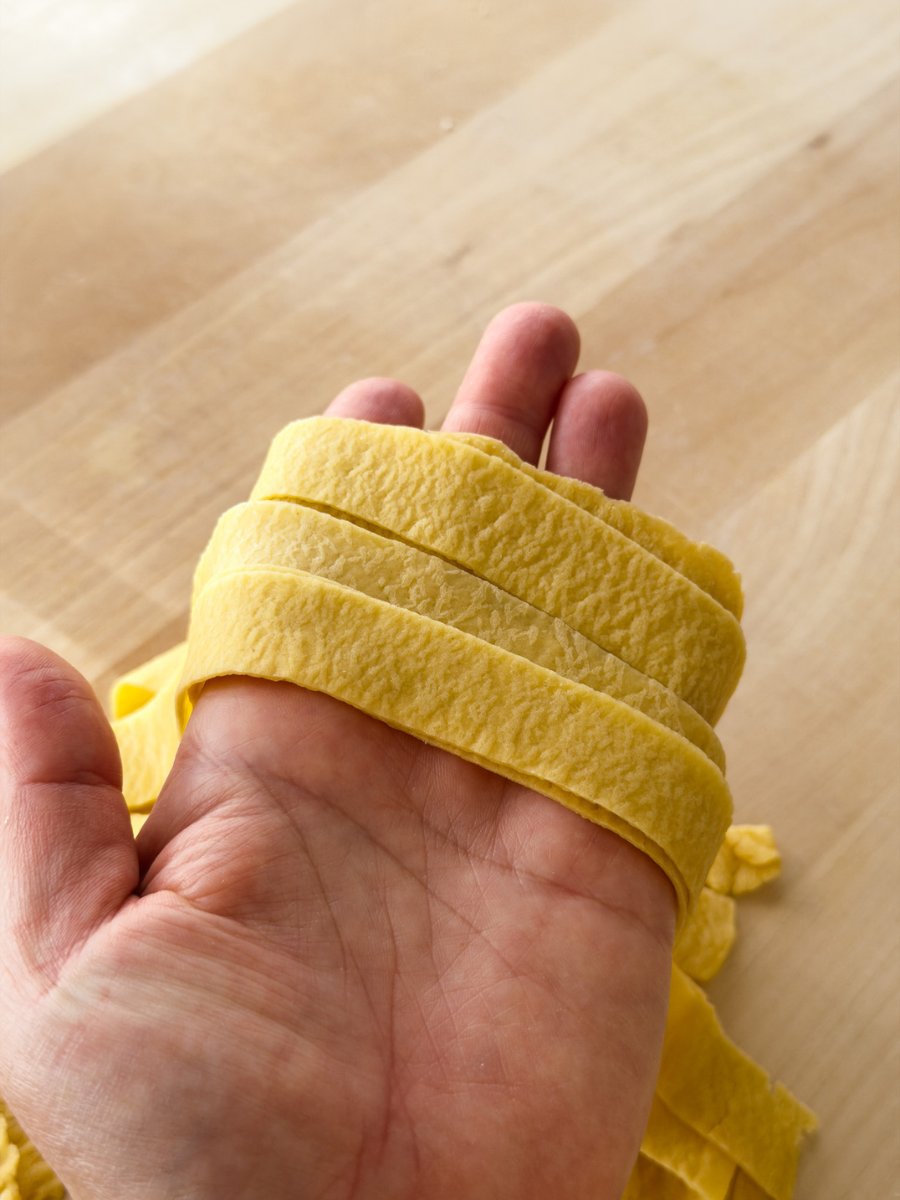
Pasta ruvida translates to ‘rough pasta’ in Italian, a signifier of the visual appearance and texture of the dough. The pasta has a rough or coarse surface texture, often with visible cracks in the dough that lends itself very well to sauce-catching.
You’re probably already familiar with this without even knowing. Next time you buy store-bought dried artisanal pasta – that’s bronze-die extruded – have a look at the surface texture and you’ll notice it’s rough. This is pasta ruvida.
But, we can also make it at home, most commonly with egg pasta dough used for long, flat shapes like pappardelle, tagliatelle etc.
Why you should try this technique
- Easy technique to master – it just takes a bit of a patience to partially dry the dough to achieve this textured pasta
- Excellent sauce-catching capabilities – that rough surface texture on the sheeted dough allows the pasta to act like a sponge and catch/absorb all of that gorgeous sauce (this is what we strive for!)
- Incredible texture and mouthfeel – the finished pasta is delicate and luxurious
How to make pasta ruvida (step-by-step instructions)
1. Make the dough
Follow my master dough recipe and rest the dough for 30 minutes.
2. Initial pass through the sheeter
Cut the ball of dough into 4 equal parts. Work with one at a time and keep the rest covered with a bowl or wrapped in clingfilm. Use your hands or a rolling pin to flatten the piece of dough, then pass it through a pasta machine on the widest setting.
Fold it in half, and pass it through again. Repeat this step several times until the dough has widened and is uniform in shape.
Then progress from setting 0 to setting 1 – we don’t want to go any further at this point.
3. Partially dry the dough
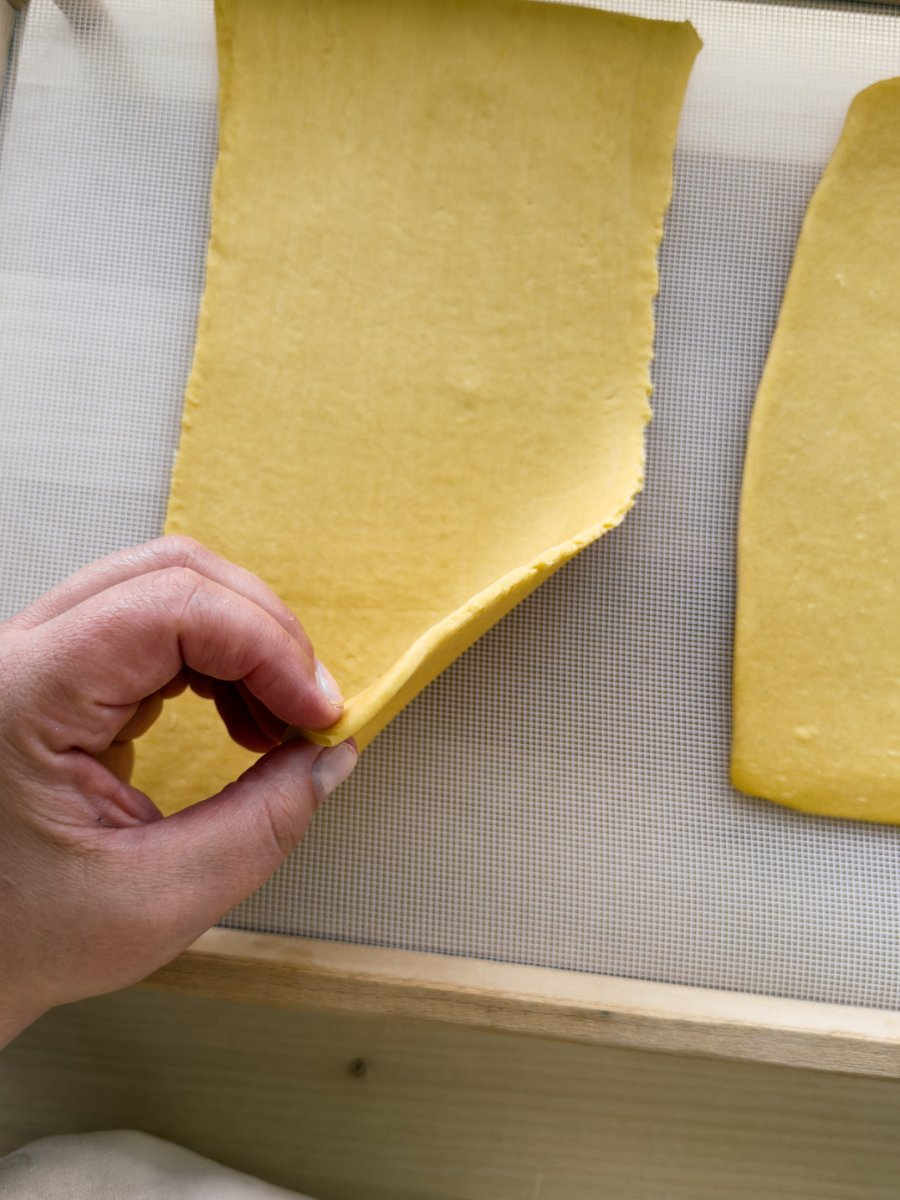
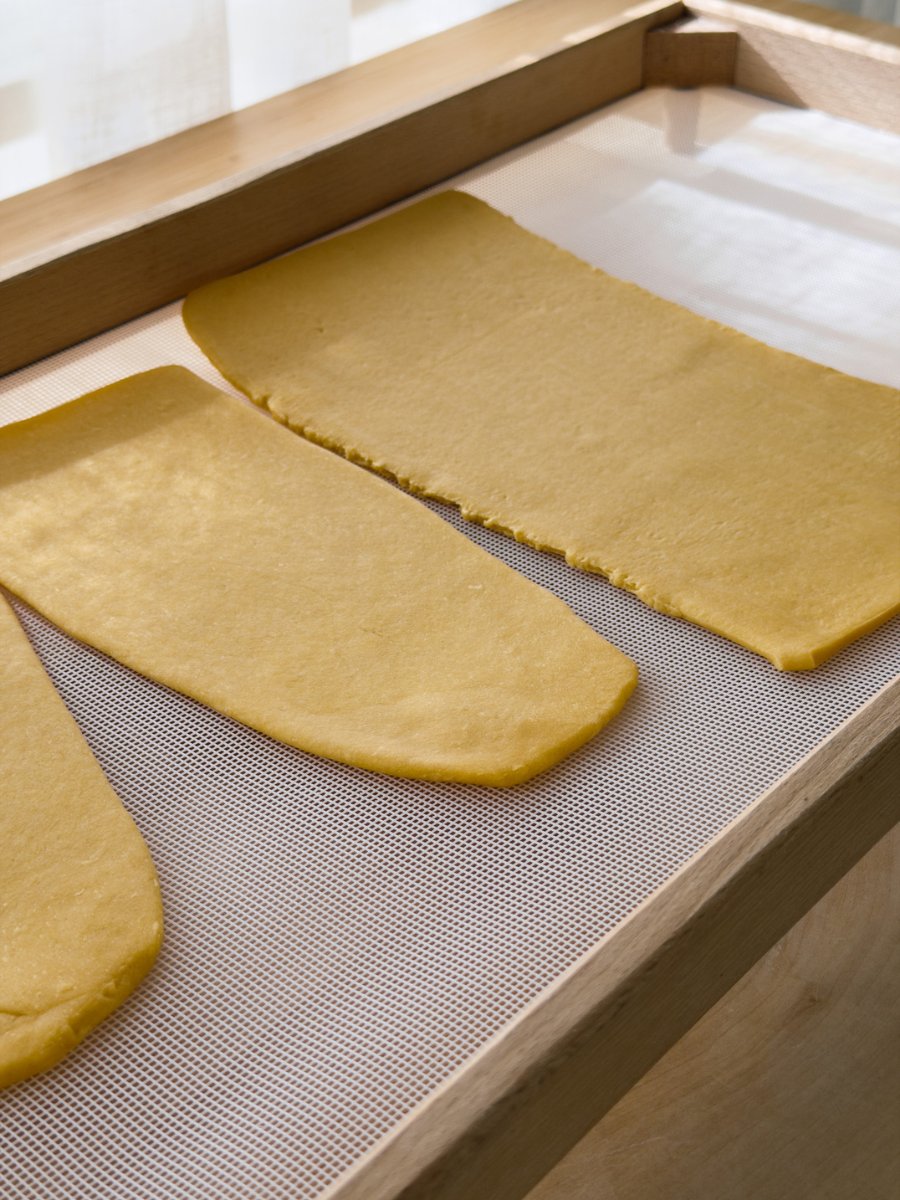
Take your thick sheet of dough and place it on a mesh drying rack or on a clean tea towel and allow it to partially dry – I do this for about 20-30 minutes in front of a small fan, flipping it over from time to time.
We want to dry the dough enough that when you bend and stretch the sheet, you can see the surface breaking. If you dry it too much however, it will break in the machine.
4. Second pass through the sheeter
Return to the pasta machine. This time increase the thickness dial to setting 5 or 6.
Use a rolling pin to lightly flatten the sheet to help it pass through the machine – you’re going from one of the widest settings to a much thinner one, and the dough can get caught and snap if you don’t do this.
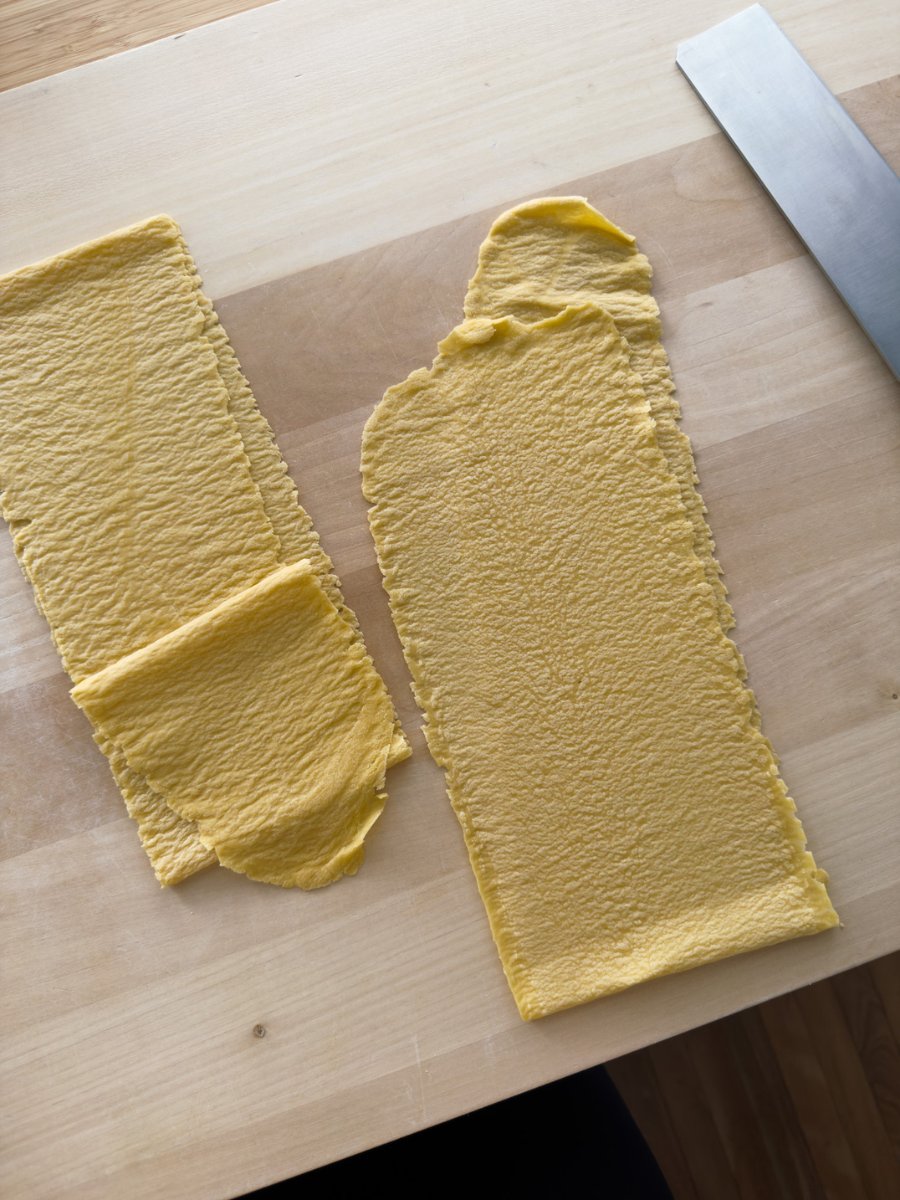
Run the dough through setting 6 once or twice if you like – you’ll immediately see that the surface texture has broken and left a wonderfully textured finish.
5. Final cut/shaping
With your sheeted dough you can now use it as you wish! Personally I love making pappardelle or tagliatelle with pasta ruvida.
Bear in mind that this dough is drier and more brittle, so while it can be used for stuffed pasta, it is a bit more fickle.
Tips and tricks for making pasta ruvida
- Start with the right kind of dough – this technique relies on partially drying the dough, so starting with the right kind of dough really helps. I like using my master pasta dough, it’s enriched with extra egg yolks, more leathery and much less hydrated than say a beginner’s 1 egg per 100g flour kind of dough.
- Use a small fan to help speed up the process – while you can dry this naturally, it can take a lot longer. Using a small fan significantly speeds up the process.
- Use a rolling pin to flatten the edge of the sheet – to help coax it through the thinner setting on the second pass. This really helps the second pass through the sheeter, as the dough is quite thick, forcing it through a much thinner setting can be tricky and the dough can easily snag.
FAQS about this technique
Can you use this for any shape?
This technique is really well suited to long, ribbon-cut pasta shapes like pappardelle, tagliatelle, fettuccine and even lasagne sheets. You can also use this for hand-formed egg pasta shapes like garganelli or stuffed pasta – however it’s worth noting that as this dough is drier and more brittle, it can be much more challenging to work with.
Can this pasta be made in advance?
You can make and shape this pasta in advance, then freeze it for cooking another time. I wouldn’t recommend making the dough in advance as the longer it rests, the more hydrated it will become which means the dough might become sticky and not be best suited to this shape. I recommend making and shaping this, then storing in the freezer. Simply arrange the shaped pasta on a baking tray and flash freeze for 20-30 minutes, then transfer to an airtight container. Cook directly from frozen in generously salted water.
If you liked this guide and are interested in learning more about making pasta at home, check out my interactive cookbook and complete guide, ‘Pasta, from scratch’.
And if you’ve made this and are wondering what sauce to pair it with, here are some of my favourites!
And as always, if you try this – please tag me on Instagram so I can see!
Pasta ruvida
Ingredients
Instructions
Make the dough
- Follow my master dough recipe and rest the dough for 30 minutes.
Initial pass through the sheeter
- Cut the ball of dough into 4 equal parts. Work with one at a time and keep the rest covered with a bowl or wrapped in clingfilm. Use your hands or a rolling pin to flatten the piece of dough, then pass it through a pasta machine on the widest setting.
- Fold it in half, and pass it through again. Repeat this step several times until the dough has widened and is uniform in shape.
- Then progress from setting 0 to setting 1 – we don’t want to go any further at this point.
Partially dry the dough
- Take your thick sheet of dough and place it on a mesh drying rack or on a clean tea towel and allow it to partially dry – I do this for about 20-30 minutes in front of a small fan, flipping it over from time to time.
- We want to dry the dough enough that when you bend and stretch the sheet, you can see the surface breaking. If you dry it too much however, it will break in the machine.
Second pass through the sheeter
- Return to the pasta machine. This time increase the thickness dial to setting 5 or 6.
- Use a rolling pin to lightly flatten the sheet to help it pass through the machine – you’re going from one of the widest settings to a much thinner one, and the dough can get caught and snap if you don’t do this.
- Run the dough through setting 6 once or twice if you like – you’ll immediately see that the surface texture has broken and left a wonderfully textured finish.
Final cut/shaping
- With your sheeted dough you can now use it as you wish! Personally I love making pappardelle or tagliatelle with pasta ruvida.